
I was hoping that it was just a stuck tensioner, it didn't seem like too much work to remove it and check it. I'd already read an item on this matter by Martin Nunn in the technical board of the forum. Thanks to Martin for that, it's nice to have some forewarning of what is involved.
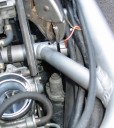 First I removed the petrol tank and airbox. The cam chain
tensioner is on the left of the front cylinder and partly obscured by the frame cross brace.
Getting to the allen screws is tricky. I have some nice long ball ended
keys
(Draper) that could reach but getting some leverage to undo the screw required
the help of some mole grips (pic1). The spring loaded action of the
tensioner caused the body of
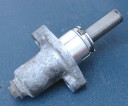 the unit to rise as the screws were undone,
so it couldn't have been that unhealthy. The tensioner was then removed.
The second photo shows the tensioner with the spring loaded plunger fully
extended.
 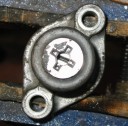 removed
you can look inside and see a slotted screw head (pic3). The top of the
body also has four notches arranged in a cross. Putting a small
screwdriver into the slot and turning clockwise retracts the plunger into
the body. Let go of the screwdriver and the plunger shoots out under
spring tension. Doing this a few times convinced me that there was nothing
wrong with the tensioner. If this isn't the case with yours, then the unit
needs replacing. Time to put the thing back and that's were the
fun begins. You can't push the plunger in with your fingers, if you try
and replace the tensioner with the plunger extended you will break the cam
chain! You need to retract the plunger and keep it that way whilst you
bolt the thing back in. Martin's solution was 'the easiest thing to do is find a old bolt that
will fit in the top of the tensioner and grind a flat on it that will fit
in the slot' I tried this approach, it did hold the plunger but the
bolt was reluctant to come out and some force had to be used. I felt that
the bolt could become locked into the screw if I wasn't careful. I noticed
that the cross shape in the body was there for a reason. I also recall
that Suzuki made a special tool for this job which looked like the tip of
a flat bladed screwdriver. What was required was a 'stepped' flat
screwdriver. The tip would engage with the slot whilst the stepped
shoulder would engage with the cross on the body. Time to make my own
tool.
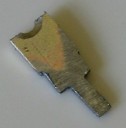
 I
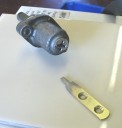
had a dig around in the scrap box and found a picture hanging bracket that
was already close to the shape I wanted (pic4) .
 I
shaped it with a file until I got this (pic5) The narrow section reaches
the screw head slot, the wider section locates into the notches on the
body and stops the tool spinning around when you let go. I had to mess
around and modify it a few times with the file before it worked reliably.
 Pic
6 shows the tenstioner body with the plunger extended.
Next wind in the plunger with a screwdriver
and hold it in place whilst you insert the tool. The plunger stays put
(pic7).
 Finally
I shortened the whole thing. (pic8)
Time now to replace the tensioner back into the engine. I expected the tensioner to drop straight in but it stood proud of the cylinder by 10mm. I didn't know if this was normal but I wasn't going to risk just screwing the tensioner in! I took it out again. I could see the slipper plate that the plunger pushes through the hole. A quick prod with a screwdriver showed that it was springy. I assumed that the chain behind the slipper was under tension and any slack in the chain needs to be moved to the rear of the cylinder. I removed the access plate on the generator cover and turned the engine over by hand and looked through the hole, there was a sudden ping and the slipper dropped down (was this the cause of the rattles, a stuck slipper plate). I placed the tensioner back into position and it fitted flush with the cylinder. I tightened the two retaining screws and then removed my tool and heard a faint click. I then turned the engine over again by hand and heard a much larger twang noise, which I guess was the plunger doing it's job. I replaced the access bolt on the tensioner, the airbox and petrol tank and started the bike up. No strange noises from the front cylinder. I let the bike warm up enough to get the choke off and let the engine idle on tickover revs. No rattles, I blipped the throttle, still nothing...success. Doing a blip like this before would result in terrible clatter as the chain lashed about.